Table of Contents
How to Build an Inexpensive Hoop-Style Greenhouse
How to Make Seed Tape
How to Make a Cold Frame
How to Turn a Pallet into a Garden
|
How to Build an Inexpensive Hoop-Style Greenhouse
http://www.albertahomegardening.com/how-to-build-an-inexpensive-hoop-style-greenhouse/
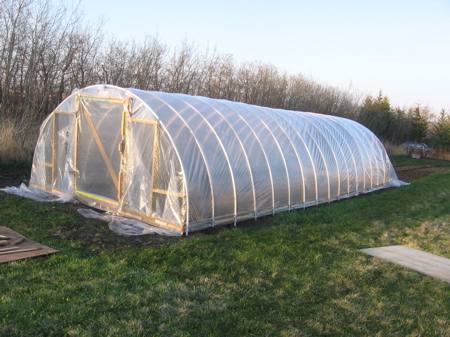
One of the most valuable assets in my garden is my greenhouse. It has allowed me to grow plants that I normally would not be able to grow, produce crops that the season is not usually long enough to produce, and protect my plants from frosts, hail, or other severe weather that normally would have destroyed my garden. But I don’t have thousands of dollars to spend on a greenhouse. I just priced out an 8’x12’ greenhouse for $3,500. I would love to have a large, professional greenhouse, but that simply isn’t financially feasible for me. So, instead I’ve found a way to make a large greenhouse that is functional, easy to build, and inexpensive. This article will explain to you exactly how to build a 12’x32’ hoop-style greenhouse for under $400. Required Materials ListNote: All wood should be green, treated wood to resist rot. (Or you can spend more money and buy a rot resistant type of lumber such as cedar.)
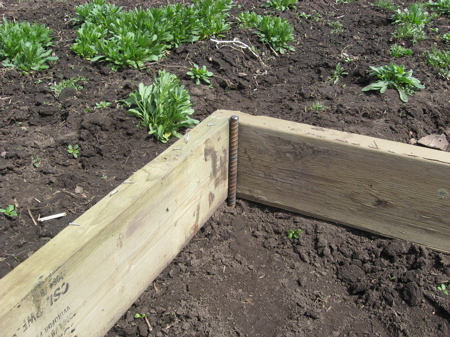
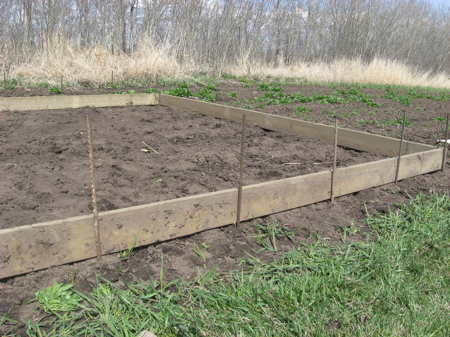
Step 1 – Laying Out the FrameUsing the 2x6s, lay out and put together your 12’x32’ frame. (You can join the two 16’ pieces with a 2’ piece of 2×4.) Ensure that the frame is square by measuring diagonally across it. You can temporarily keep the frame in place by pounding a 30” piece of rebar in each corner. (You can pull these out to use them in the next step.)
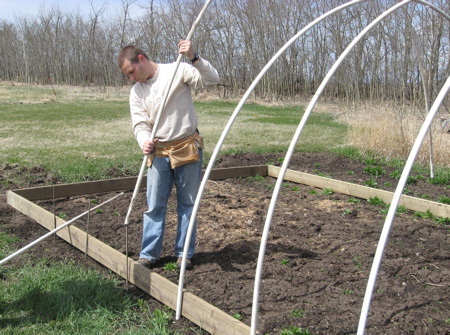
Step 2 – Adding the HoopsCut each 10’ piece of rebar into four 30” pieces of rebar. This will give you thirty-four pieces. Pound the rebar into the ground about 15” deep on the outside of your frame at two foot intervals. This will leave 15” sticking up out of the ground.
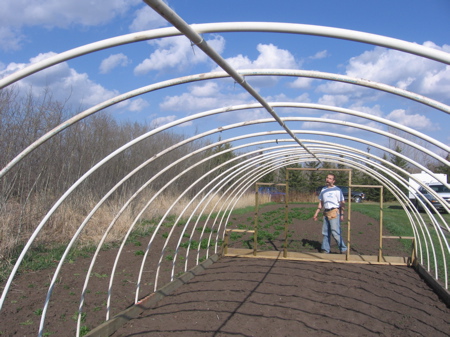
Now slide both ends of your pvc pipe over the rebar to make a hoop across the width of your greenhouse.
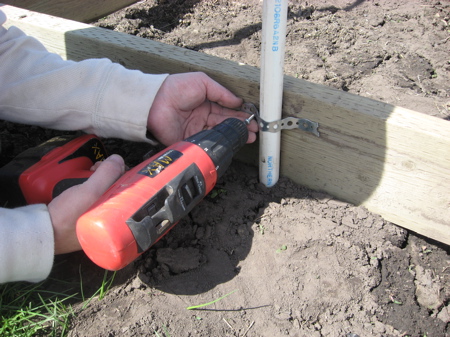
Attach the pvc pipe to the 2x6s by screwing short pieces of metal banding around the pipe.
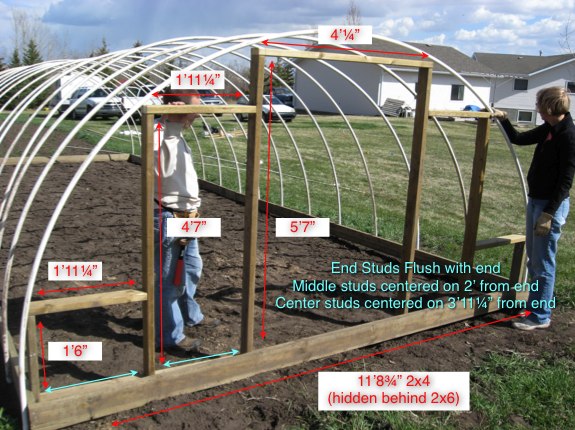
Step 3 – Building the EndsCut the following pieces out of your 12’ 2x4s:
For each end, assemble the wall according to the following diagram.
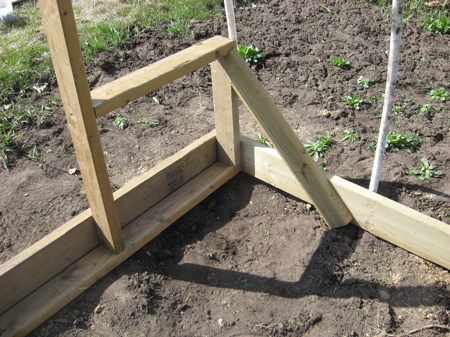
Place this wall within the 2×6 frame and nail/screw in place. Cut (4) 28” 2×4 pieces. Cut one end at a 45º angle. Use these pieces to brace the wall.
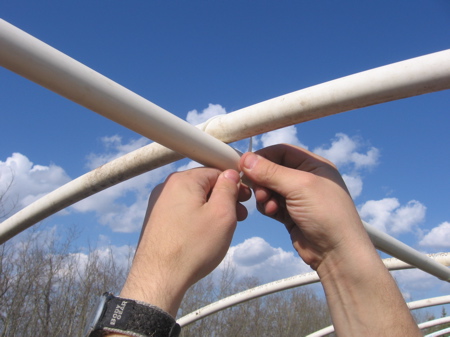
Once all of the hoops and the two ends are in place, connect two pvc pipes together and cut them to measure 32′ long. This will be the rib that will go along the top of your hoops. You can attach this rib with plastic zip ties.
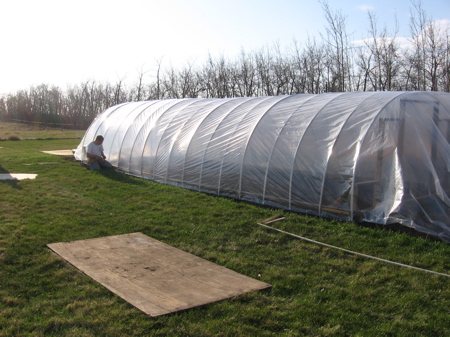
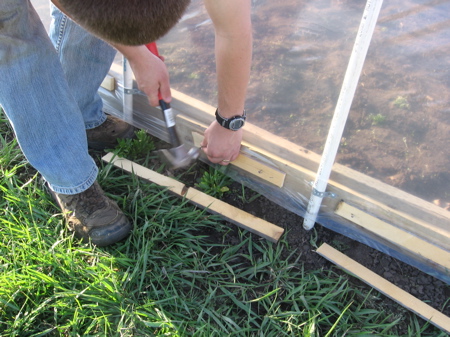
Step 4 – Covering the Greenhouse with PlasticIf you are going to use wood lathe, cut 32 pieces of 20” lathe. These will secure the plastic to the sides of the 2×6 frame in between each hoop. Or optionally, you can use staples, though they may have a tendency to pull through the plastic. Drape the plastic over the length of the greenhouse. Be sure to have enough overlap at the ends to cover the end walls. Pull the plastic snug and attach to the 2x6s at one end using the wood lathe or staples. Go to the other end, pull snug, and attach in a similar manner. Do this at the center, and then along the rest of the length of the greenhouse.
Note: If you can do this in warm weather, there will be less sagging later. Make it as snug as you can without causing damage to the plastic.
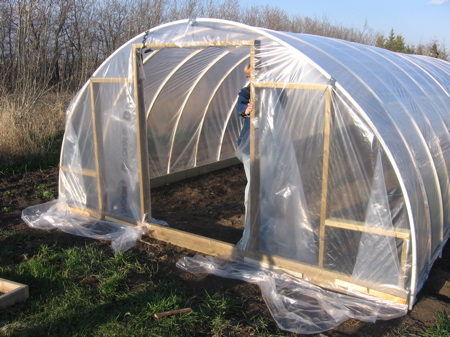
To attach the plastic to the ends, pull the plastic straight down, and attach with lathe. Then pull the plastic out to the sides. This will give you extra plastic along the outside edge. Fold the plastic back towards the center and attach. For the end with the door, cut out the plastic leaving a few inches of over hang to wrap inside and attach.
Step 5 – Adding the DoorBefore you cut your pieces, check the actual measurements for the space you have. Your wall may sit a little different than mine. It’s always better to go a little small or your door may not fit. But if the measurements are the same, cut the following pieces out of your 12’ 2x4s:
Nail these together to make your door frame. Lay a 2×4 diagonally across the frame and nail in place. Trim off anything that hangs over the frame of the door. This will be on the inside of your door. Too much wood hanging over will jam your door. Attach the hinges to the door frame.
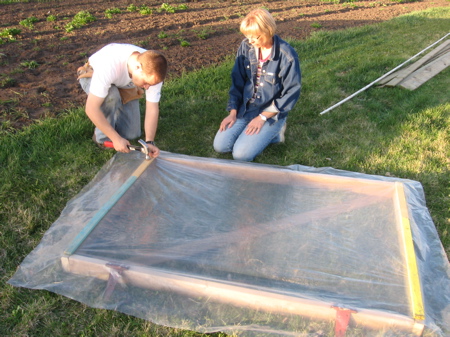
Cover the outside of the door with remaining plastic or you can use plywood if you would rather. You can attach the plastic with the wood lathe or staples. There should be about 4” of overhang of plastic on all sides. Attach the door handles to the door. Mount the door to the frame.
And there you go! You can have a beautiful 12’x32’ hoop-style greenhouse that can be built in a weekend and all for less than $400 How To Make Seed Tape http://gardengirltv.blogspot.com/2011/03/how-to-make-seed-tape.html How To Make a Cold Frame Step 1: Cut the Lumber for All Sides of the Cold FrameThis cold frame will be 6' wide and 3' deep. Use 2" x 12" lumber on the sides and back and 2" x 8" lumber on the front side where the access to the frame's interior will be. Measure one 2" x 12" lumber 72" long for the back, one 2" x 8" lumber 72" long for the front and two 2" x 12" lumber 36" long for the sides; cut the boards with a circular saw. Step 2: Mark the Cuts for the Angled SidesLay the pieces out to form the cold frame. In order to catch the energy from the sun, the top of the cold frame needs to be angled at least 1" in drop per foot of depth. Since the box is 3' deep, you need at least a 3" drop from the back to the front. On this project, there's a 4" difference between the heights of these boards so you can use that as the measurement to angle the sides. Make a mark for the lowest point, where it lines up with the 2" x 8" lumber at the front. Now take the level and draw a line from this mark to the upper back corner. Repeat this step on the other side. Step 3: Cut the Angled SidesCut along the angled lines on the sides of the cold frame. The straighter the cut, the tighter the fit will be between the lid and the frame. This slope will support the lid of the cold frame.  Step 4: Assemble the Bottom of the Cold FrameUse 3" galvanized screws to attach the sides together. Pre-drill the holes before putting in the screws to prevent splits. Add L-brackets to each of the inside corners of the box; put two brackets per corner, one near the top and one near the bottom. This will keep the corners from splitting apart when it's moved.  Step 5: Cut and Install the InsulationIn order to retain heat inside the cold frame, it's necessary to add insulation; you can use insulation boards used to face houses. Take the measurements of the interior walls in the cold frame box and transfer those to the insulation boards. The boards cut easily with a sharp pocket knife or box cutter. Install the insulation to the inside walls of the cold frame. Use construction adhesive to attach them. Add 1-1/4" screws to each piece to keep the insulation in place as the adhesive sets up.  Step 6: Cut the Lumber for the LidMeasure and cut two 2" x 2" pieces of lumber, each to a length of 39", and cut two 2" x 4" pieces of lumber, each to a length of 69-3/4". These pieces will make the casing for the cold frame lid. Measure and cut two 2x2s 32" long; they will serve as a support brace for the center of the lid. Form the pieces into the frame of the lid. Make sure that the outer dimensions of the lid are the same size as the outer dimensions of the base of the cold frame. Otherwise the lid and box won't line up. Note: You can recycle an old window or glass-paned door to use as the lid for your cold frame. It's important that lots of light passes through the lid in order to get the heat build-up you need. Make sure to the construct the cold frame around the dimensions of the window or door.  Step 7: Assemble the LidPre-drill the holes the lid's frame because the wood is narrow and will split easily. Then use 3" galvanized screws to screw the lumber together; the wooden frame for the lid is complete. Lay the Plexiglas on top of the frame and square up the edges of the glass with frame to make sure they'll fit together. Remove the Plexiglas and run a line of construction adhesive around the top edge of the frame. Then place the Plexiglas back on top of the frame. Using a Plexiglas drill bit, drill holes every 4" to 6" around the frame and secure with screws. The adhesive and screws together will make the lid more water- and airtight.  Step 8: Attach the Lid to the Cold FrameUse utility hinges to secure the lid to the top of the cold frame. You could also use window or gate hinges. To attach the hinges, center the hinge joint between the lid and top of the frame box at one end of the cold frame and mark where to pre-drill. Repeat step at the other end. Then pre-drill the holes for the screws; put the hinges in place and attach them with 1-1/4" screws. Next, measure in 22" from the center of the outside hinges at both ends of the frame box. Mark and pre-drill the holes and attach the last two hinges with screws. There should be a total of four hinges securing the lid onto the cold frame. 
How to Turn a Pallet into a Garden
Good news and bad news. I had planned to film a short video showing you how to make a pallet garden, but the weather didn’t cooperate. I was stapling the landscape fabric onto the pallet when it started drizzling and got really windy. That’s the bad news. But I know I promised a tutorial today, so I took photos and have kept my word to share how to make the pallet garden. I tried to be as detailed as possible. That’s the good news. So keep reading my pallet loving friends, instructions on how to make your own pallet garden are just a few lines away… Find a PalletThe first thing you need to do is–obviously–find a pallet. I’ve had good luck finding them in dumpsters behind supermarkets. No need to be squeamish. It doesn’t smell. At least, it doesn’t smell that bad. Collect Your SuppliesFor this project, you’ll need the pallet you found, 2 large bags of potting soil, 16 six packs of annual flowers (one six pack per opening on the face of the pallet, and two six packs per opening on the top of the completed pallet garden), a small roll of landscape fabric, a staple gun, staples, and sand paper. Get Your Pallet into ShapeOnce you’ve dragged your pallet home, give it a once over. Are any of the boards a little loose? Is the wood chipping in places? Nail down any loose boards, and use sand paper to smooth down any rough spots. Let the Stapling Begin!Decide which side of the pallet will be the bottom when the pallet garden is completed and leaning against the wall. You are going to be covering the bottom, back, and sides with landscape fabric, leaving the spaces between the slats and the top uncovered (you’ll be planting flowers in the uncovered spaces). Lay the pallet face down. Roll the landscape fabric over the back. Cut two identically sized pieces that are long enough to go from the top edge of the back of the pallet and wrap all the way around the bottom, plus a few extra inches.
Hold the two pieces of landscape fabric together as if they were one piece of fabric. Fold over the top edge by one inch and center it on the top board of the back of the pallet. Staple the fabric into place near the top edge of the top board. Smooth the fabric out to the left and right and pull it taut. Staple the fabric down on the top, right edge of the top board. Repeat on the left side. Fill in between those three staples with one staple every two inches along the top edge of the top board. When the top of the landscape fabric is securely attached to the top, back board, smooth the fabric down, and repeat the process along the bottom edge of the bottom board, except don’t fold the fabric under, leave a long flap on the bottom. Pulling the fabric tautly along the bottom, fold the cut edge under, and staple the fabric down along the front edge of the bottom. Smooth the fabric out to the left and right and staple every two inches along the front edge of the bottom. Now for the sides. Start near the bottom and fold the excess fabric inwards as if you were wrapping a present. Fold the cut edge of the fabric under and staple it down near the front, bottom edge of the side facade. Smooth the fabric out and place a staple every two inches along the front edge of the side of the pallet. The fabric should be taut but not in danger of tearing. Repeat on the other side of the pallet.
You should now have a pallet with landscape fabric wrapped around the sides, back, and bottom. Place more staples along the spine of the back side of the pallet, and anywhere else you think the fabric needs to be held down so that soil can’t creep into places you don’t want it to go. Now for the Fun Part–Planting!Bring the pallet close to wherever it’s final spot will be and lay it down face up. You’re going to plant it while it’s laying flat on the ground.
First slide the plants into what will be the top. Plant everything very tightly, you should have to practically shoe horn the last plant into place. Now that you have capped the top, pour the entire first bag of potting soil on top of the pallet. Push the soil into the pallet between the slats and smooth it out so that the soil is level. Repeat with the second bag of potting soil.
Push potting soil into the bottom cavity, so that there is a trench directly below one of the bottom openings. Plant six plants in the trench, so that they are very tightly fitted into the opening. Repeat with the other bottom opening. Now push the potting soil up against those flowers you just planted, making a trench beneath one of the openings in the second row. Plant your flowers tightly in that opening. Repeat for all the remaining openings.
When you’re done planting, you should have plants that are completely covering every opening (i.e. there shouldn’t be any place for soil to fall out). There should also be soil firmly pushed into every part of the pallet where there aren’t plants. Caring For your PalletNow, I’m going to tell you what you should do, and I what I always end up doing (which is what you should not do). You should leave the pallet flat on the ground for a couple of weeks (watering when needed), so that the roots can start to grow in and hold all the plants in place. I can never wait though, so I always tip the pallet upright a few days after planting. Some soil does fall out, but it seems to be okay. But I think it would be better if you left it to settle and only tipped it upright after a few weeks. Do as I say, not as I do.
Water your pallet regularly, they dry out quickly. Pay special attention to the bottom two openings, they seem to be the driest. Fertilize with water soluble fertilizer added to your watering can (follow package instructions for amount and frequency).
|

 Don’t just take the first pallet you find. You’re looking for one with all the boards in good condition, no nails sticking out, no rotting, etc. If you intend to put edibles in your pallet, be sure to find one that was


